
YouTube video editing is key for creators wanting to keep viewers interested. With billions of videos online, it’s hard to stand out. But, smart editing can make your video a hit.
Whether you’re new or experienced, this guide has tips to boost engagement. Learn how to use transitions and adjust audio to keep viewers watching. These strategies are for anyone wanting to increase watch time and grow their channel.
Key Takeaways
- Effective YouTube video editing techniques directly influence viewer retention rates.
- Tools like Adobe Premiere Pro or Final Cut Pro simplify implementing these strategies.
- Strategic cuts and background music adjustments can extend average watch duration.
- Visual effects and text overlays add professionalism without overwhelming viewers.
- Regular reviews using YouTube Analytics highlight which editing choices work best.
Understanding the Importance of YouTube Video Editing
YouTube is all about great content, but raw footage doesn’t always grab viewers. Editing is key, turning clips into stories that keep people watching. Every edit, transition, and sound change affects how your message is seen.
“Editing isn’t just fixing mistakes—it’s the art of guiding attention.” – CreativeLive YouTube Masterclass
Why Editing Matters
Tools like Adobe Premiere Pro or DaVinci Resolve help creators improve pacing and clarity. Bad cuts or too much going on can lose viewers fast. Editing makes sure:
- Scenes flow well together
- The tone matches your brand
- Important messages stand out
Impact on Viewer Engagement
Studies show edited videos keep 40% more viewers watching past 30 seconds than raw footage. Editing boosts engagement in several ways:
| Aspect | Edited Videos | Unedited Videos |
|---|---|---|
| Average Watch Time | 65% completion | 32% completion |
| Comment Interaction | 2x higher | Low engagement |
Smart cuts and clear audio are more than just tech steps. They’re strategies to keep viewers coming back. Next, we’ll look at how planning content works with these techniques to make a bigger impact.
Setting the Stage: Planning Your Video Content
Good video content planning starts with being clear. Before you start filming, know your goals, who you’re making it for, and what they’ll learn. A solid plan makes sure every part of the video has a reason to be there, keeping viewers interested all the way through.
Start with a script that outlines what will be said, shown, and when. Use storyboards to see how scenes will flow, including how fast or slow they’ll go. Knowing your main message from the start helps guide all your creative decisions.
| Step | Action | Outcome |
|---|---|---|
| 1 | Identify audience pain points | Align content with viewer interests |
| 2 | Create a script outline | Avoid disorganization during filming |
| 3 | Storyboard scenes | Visualize flow and timing |
Tools like Google Docs or Trello are great for organizing your ideas. For example, a beauty tutorial might plan the order of products to match the difficulty level. This helps viewers follow along easily. Without planning, editing can be confusing and viewers might lose interest.
Remember, 70% of viewers leave videos within the first minute if they don’t feel connected. Good video content planning turns vague ideas into engaging stories. Every minute you spend planning saves hours in editing and makes viewers trust you more.
Mastering Creative Transitions and Visual Effects
Smooth cuts and dynamic visuals can make videos unforgettable. Creative editing transitions guide viewers through your story smoothly. They blend scenes and add flair, keeping viewers engaged.
Seamless Transition Techniques
- Match cuts: Align action between clips, like a door closing in one shot opening in the next.
- L-cuts: Separate audio and video timing to build suspense or highlight dialogue.
- Pixel motion: Use software like Adobe Premiere Pro to animate objects across scenes.
Utilizing Visual Effects
Subtle effects can enhance emotion without overpowering the content. Try:
- Color overlays to set moods (e.g., warm tones for nostalgia).
- Split screens for side-by-side comparisons.
- Particle effects during scene changes to signal time jumps.
DaVinci Resolve offers free plugins for refining transitions. Test effects in short clips first. Too many glows or zooms can overwhelm viewers. A well-timed fade often works better than flashy 3D flips. Let transitions enhance the story, not just fill space.
Enhancing Audio for a Superior Viewer Experience
Great audio is key for any YouTube video. These audio enhancement tips make your content sound as good as it looks. Bad sound can pull viewers away, but good audio keeps them interested.
Begin with a noise-canceling microphone for clear dialogue. Background music should enhance your message without drowning out speech. Adjust volume levels across scenes with software for a consistent sound.
- Remove background noise with tools like Audacity’s noise reduction feature.
- Use EQ adjustments to balance highs and lows for natural sound.
- Test audio in different environments to catch issues early.
| Tool | Key Features | Ease of Use |
|---|---|---|
| Audacity | Noise reduction, multi-track mixing | Beginner-friendly |
| Adobe Premiere Pro | Advanced audio sync, spectral repair | Moderate learning curve |
| iZotope RX | Dialogue Isolation, De-essing | Professional-grade tools |
Using the right software with these audio enhancement tips makes for a smooth experience. Tools like GarageBand (for Mac) or free options like Ocenaudio are easy to use. Good audio quality shows you value your viewers’ experience, leading to more watch time and engagement.
Youtube video editing tips to retain viewers watching your video
Keeping viewers engaged from start to finish is key. Let’s explore ways to turn casual viewers into dedicated fans.
Retention Strategies in Editing
Removing unnecessary scenes and improving pacing are crucial for efficient retention editing. Adobe Premiere Pro or DaVinci Resolve can help. Focus on these key steps:
- Cut out unnecessary dialogue to keep things lively
- Include call-to-action prompts during quiet moments
- Match edits with your content’s emotional peaks and valleys
Effective Cutting and Pacing
Fast cuts work well in vlogs, while smooth transitions are better for tutorials. Aim for 10-15 second scene changes to keep viewers interested. Try breaking a 10-minute video into 3-5 easy-to-follow parts.
Case Studies of Successful Videos
PewDiePie’s early vlogs used quick cuts to keep the energy up. Casey Neistat also mastered pacing with his handheld camera style. Both kept over 90% of viewers watching for the first 3 minutes. Their secret? Less is more—edit carefully to focus your message.
Use these tips for your next video. Let your content’s natural flow guide your editing choices. Watch as your viewership numbers soar.
Integrating Graphics and Text Overlays to Boost Engagement
Integrated graphics overlays can make videos more engaging. Use lower thirds to show speaker names or titles, making it easier to follow. Animated text can highlight important stats, and callouts can point out key details without being too much.
- Lower thirds add context to speaker identity or scene transitions.
- Animated text emphasizes quotes or data points for instant impact.
- Callouts simplify complex ideas with visual cues like arrows or icons.
It’s important to find the right balance. Too many graphics can be distracting. Make sure to test how well your overlays work on different devices. Adobe Premiere Pro or Final Cut Pro are great tools for adding these elements easily.

Match the pace of your video with the overlays. For example, fade in text during pauses or sync animations with the music. Smooth transitions are key to avoid jarring the viewer. Check how the overlays guide the viewer’s attention without taking over the main content.
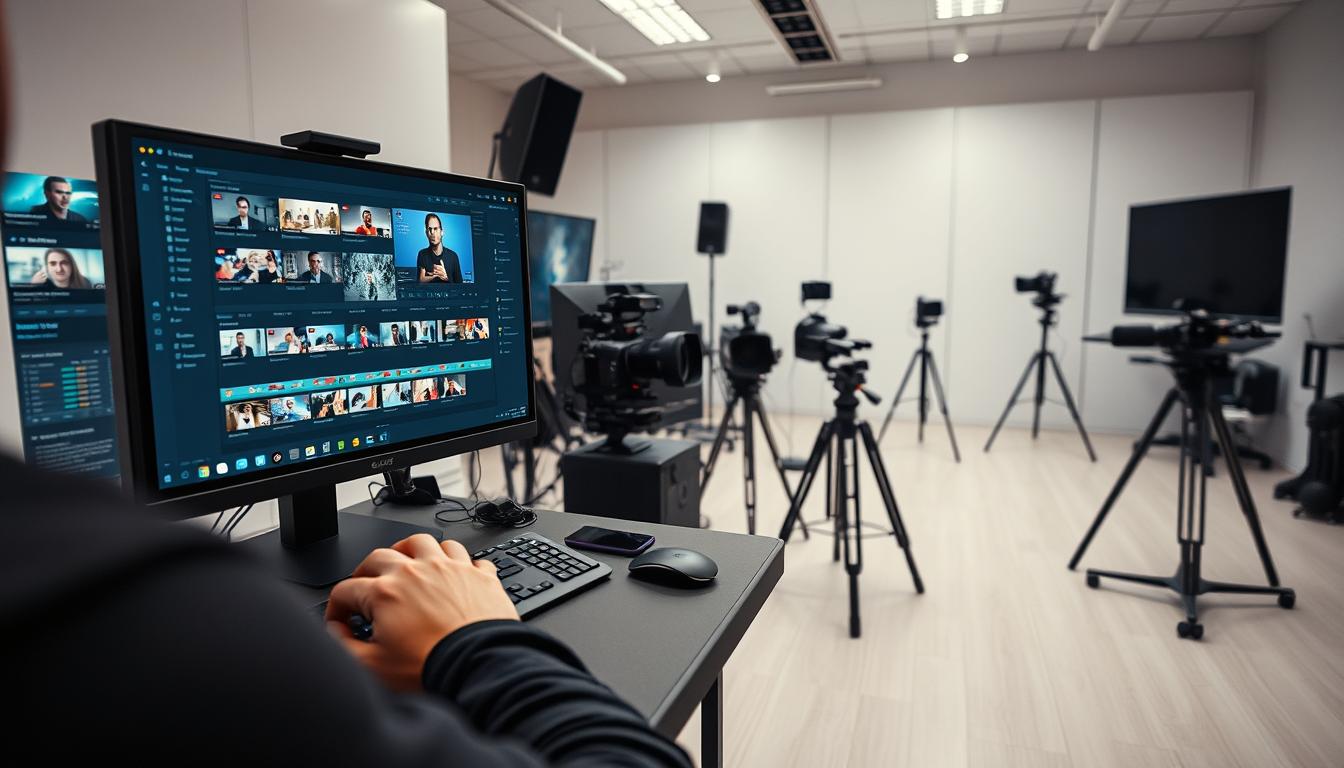
Leveraging Software and Tools for Efficient Editing
Efficient video editing starts with the right video editing software tools. These platforms make tasks easier, speed up production, and boost creativity. Let’s look at how to pick and use them well.
Top Editing Software Options
Leading platforms offer various features for different needs:
- Adobe Premiere Pro: Industry standard with advanced effects and integration with Creative Cloud.
- Final Cut Pro: Mac-centric with intuitive editing for quick turnaround.
- DaVinci Resolve: Free version includes professional color grading tools.
- CapCut: User-friendly for quick edits and social media-ready content.
Choosing the Right Tools
Think about your budget, skill level, and project goals. Free options like CapCut are great for beginners. Professionals might prefer paid tools like Premiere Pro. Also, check if the software works with your operating system.
Streamlining Your Workflow
Here’s how to organize your workflow:
- Use templates to save time on recurring projects.
- Automate repetitive tasks like background removal or audio syncing.
- Regularly update software to access new features and fixes.
Choosing the right video editing software tools makes production smoother and results better. Try different options to find what works best for you!
Reviewing and Refining Content for Maximum Impact
Polishing your video makes sure every detail counts. Use these tips to make your rough cuts shine.

Self-Review Techniques
First, watch your video in silence to catch pacing issues. Use a checklist for clarity:
- Are transitions smooth?
- Does the audio match visuals?
- Is the message clear?
Incorporating Peer Feedback
“A fresh pair of eyes catches what you overlook.” – Casey Neistat
Peer feedback adds a new view. Share your video with 2–3 trusted viewers. Ask them to note:
| Aspect | Self-Review | Peer Feedback |
|---|---|---|
| Perspective | Creator’s vision | Viewer’s perspective |
| Time Investment | Quick checks | Deeper analysis |
| Detail Level | Technical fixes | Content suggestions |
Iterative Improvement Methods
Follow this cycle for growth:
- Watch your video without music to focus on visuals.
- Use peer feedback editing insights to adjust cuts or tone.
- Test changes with a small audience before finalizing.
- Repeat the process for every upload.
Small tweaks based on feedback can make a big difference. Keep refining until your video is perfect.
Conclusion
Effective YouTube video editing is a continuous learning journey. It involves mastering smooth transitions and strategic graphics to keep viewers engaged. Tools like Adobe Premiere Pro or DaVinci Resolve make this easier, but the real secret is putting in the effort every day.
Improving your content over time is key. Check your analytics often, try new editing methods, and adjust based on what viewers say. Even small changes, like tweaking the pace or sound, can make a big difference. This keeps your videos fresh and interesting.
Begin making these changes today. Every little edit counts, whether it’s cutting scenes or making visuals pop. It’s not about being perfect; it’s about growing and getting better. Stay open to new ideas, use tools like Canva for graphics, and keep improving. The most successful creators are those who never stop learning and perfecting their skills.
FAQ
What are the best YouTube video editing tools available?
Top YouTube video editing tools include Adobe Premiere Pro, Final Cut Pro, and DaVinci Resolve. Each tool has unique features for different editing needs. Whether you’re new or experienced, there’s something for everyone.
How can I engage viewers more effectively with my editing?
To engage viewers, use creative transitions and visual effects. Also, enhance audio and keep the pace dynamic. Adding graphics and text can help keep viewers interested.
Why is sound quality important in video editing?
Sound quality is key because it improves the viewer experience. Clear audio, the right background music, and balanced levels make your content engaging.
What are some retention strategies I can apply to my videos?
To keep viewers, edit for pacing and use concise cuts. Storytelling is also important. Learning from successful channels can offer insights and ideas.
How can I improve my self-review process after editing?
To improve self-review, set clear goals for your video. Use checklists for pacing, audio, and structure. Getting feedback from others can also help.
What is the significance of planning my video content before editing?
Planning is crucial for a well-structured video. It outlines the video’s direction and ensures each part is engaging. Pre-production, like storyboarding, makes editing smoother and the final product better.
Can you explain the benefits of using graphics and text overlays?
Graphics and text overlays highlight important points and make your video more interactive. They enhance visuals and quickly convey information, making your video more engaging.